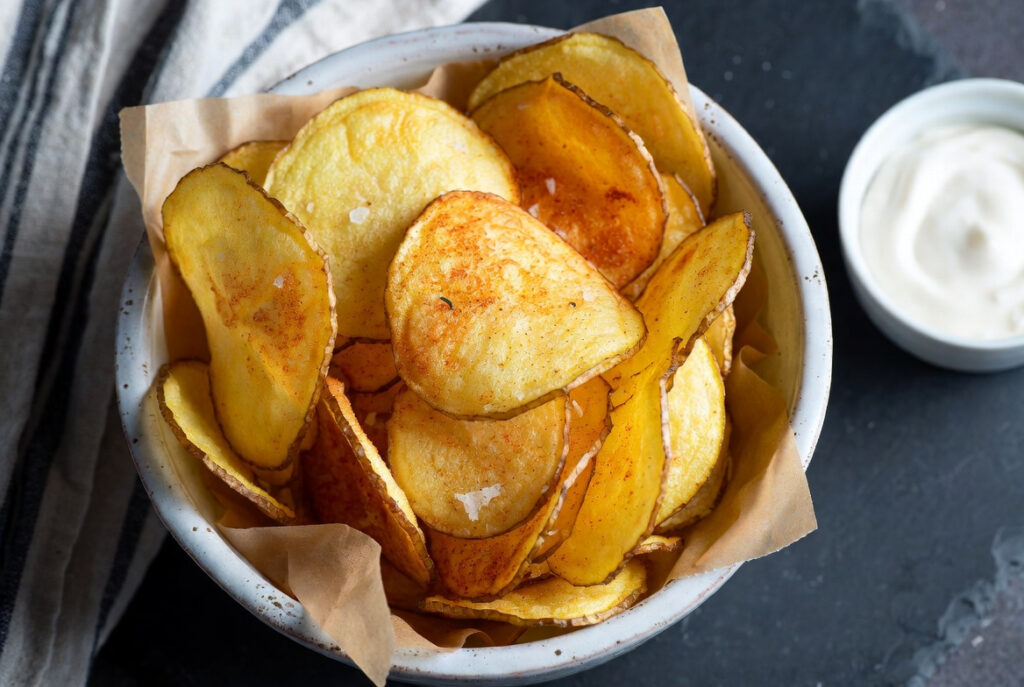
Homemade Chips in the Air Fryer: Crunchier Than Your Mood on a Monday
You know that moment when you’re craving chips, you check the cupboard, and the bag is either empty or has exactly four sad broken pieces rattling around at the bottom? Devastating. Truly. But here’s the thing—you’ve got potatoes, you’ve got an air fryer, and you’re about fifteen minutes away from a bowl of the crunchiest, most satisfying homemade chips you’ve ever eaten. No deep fryer. No giant pot of bubbling oil. No guilt spiral. Just proper, golden, crispy chips made entirely by you. Let’s get into it.
Recipe Overview
| Prep Time | Cook Time | Total Time | Servings | Skill Level |
|---|---|---|---|---|
| 20 minutes | 15–18 minutes per batch | 35–40 minutes | 3–4 | Easy |
Why This Recipe Is Awesome
Where do we even start? Homemade air fryer chips give you everything you love about crisps from a bag—the crunch, the seasoning, the completely irresistible snackability—without the industrial oil bath or the ingredient list that sounds like a science experiment. You use maybe a tablespoon of oil for the whole batch. One tablespoon. That’s practically nothing.
The air fryer is genuinely the perfect tool for homemade chips. It circulates hot dry air around every surface of every slice simultaneously, which is exactly the environment thin potato chips need to dehydrate and crisp up beautifully. No flipping required every 30 seconds. No oil splashing. No smoke alarm involvement—mostly.
Is it idiot-proof? Almost entirely, yes. The one technical skill required is slicing the potatoes thin and consistently, and even that’s forgiving once you understand what you’re aiming for. IMO, the trickiest part of this whole recipe is not eating them directly out of the air fryer basket before they’ve had a chance to cool and fully crisp up. That requires genuine self-control that not everyone possesses. No judgment.
You also get to be completely in charge of the flavor. Salt and vinegar? Done. Smoky paprika? Easy. Cheese and onion vibes? Absolutely achievable. Your kitchen, your chips, your rules.
Ingredients You’ll Need
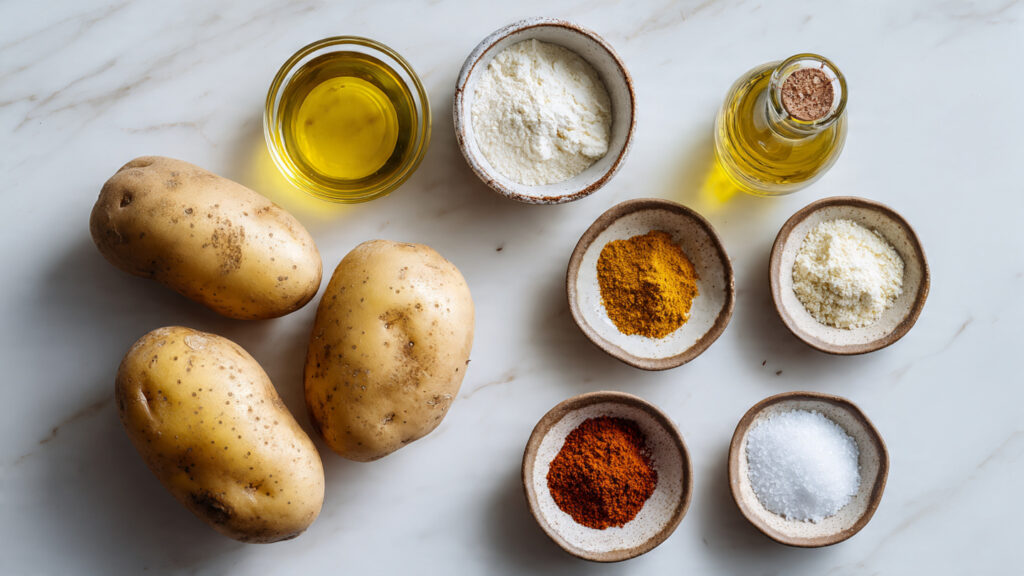
- 2 large Maris Piper or russet potatoes — the high-starch workhorses of the chip world. Their low moisture content is your best friend here
- 1 tablespoon olive oil or sunflower oil — just enough to help things crisp and carry the seasoning. This is not the time for generosity with oil
- ½ teaspoon fine sea salt — added after cooking, while the chips are still hot and ready to absorb it properly
- ½ teaspoon smoked paprika — gives color, depth, and that subtle smokiness that makes people ask what your secret is
- ¼ teaspoon garlic powder — because garlic powder belongs everywhere it’s invited, and chips always invite it
- ¼ teaspoon onion powder — the quiet contributor who never gets enough credit
- Optional: pinch of white pepper — slightly more delicate than black pepper and works beautifully on thin chips
- Optional: malt vinegar spray or cider vinegar — for salt and vinegar chips that genuinely taste like the real thing
Step-by-Step Instructions
1. Wash your potatoes thoroughly — leave the skin on. The skin adds flavor, crisps up well on thin slices, and saves you a solid five minutes of peeling. Just make sure they’re properly clean. Scrub them under cold water and pat dry before you start slicing.
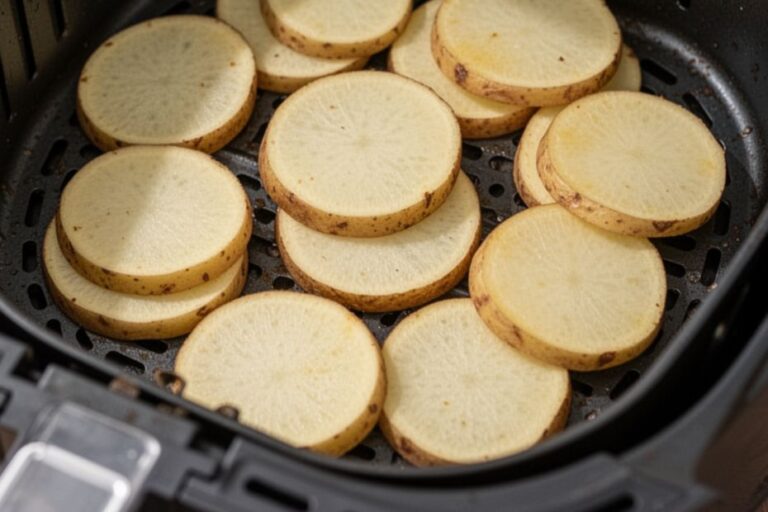
2. Slice the potatoes as thinly as possible — aim for 1–2mm thickness. This is the most critical step in the entire recipe. A mandoline slicer set to its thinnest setting is the gold standard here. If you’re using a sharp knife, work carefully and aim for consistency above all else. Uneven slices mean some chips burn while others are still chewy, and that’s a deeply unsatisfying outcome after all this effort.
3. Soak the sliced potatoes in a large bowl of cold water for 15–20 minutes. This draws out excess surface starch—the stuff that stops your chips from getting properly crispy. Don’t skip this step. After soaking, drain them completely and spread them across a clean kitchen towel. Pat them as aggressively dry as you can. Wet chips steam instead of crisping, and steamed chips are just sad, floppy disappointments.
4. Preheat your air fryer to 350°F (175°C) for 3–4 minutes. Slightly lower than typical air fryer recipes because chips are thin and delicate—they need enough time to dehydrate and crisp without the edges burning before the centre cooks. Preheating ensures they start crisping the moment they hit the basket.
5. Toss the dried potato slices lightly in olive oil and your dry seasonings (except salt). Use your hands to make sure every slice gets an even, light coating. You want a thin film of oil, not a puddle. Hold the salt until after cooking—salt draws moisture out during cooking and actively works against crispiness. Save it for the finish.
6. Lay the chips in a single layer in the air fryer basket with no overlapping. Single layer is the law, not a suggestion. Work in batches—two or three depending on your air fryer size. Overlap them and they’ll steam each other into soft, limp sadness. Give them space and they’ll reward you handsomely.
7. Air fry at 350°F for 15–18 minutes, checking every 5–6 minutes and gently moving them around. Watch carefully in the final 3–4 minutes—thin chips can go from perfectly golden to charred very quickly. Pull them when they’re deep golden and starting to look dry. They will crisp up further as they cool, so don’t wait until they look like they’re done done.
8. Transfer immediately to a wire rack and season with fine sea salt while still hot. The wire rack lets air circulate underneath so moisture doesn’t soften the bottom. Salt sticks perfectly to hot chips fresh from the fryer. Taste one—because obviously—and add more seasoning if needed.
Common Mistakes to Avoid
| Common Mistake | Solution |
|---|---|
| Slicing too thick | Anything over 2mm and you’re making crisps with the texture of shoe leather. Slice thin, slice consistent. A mandoline is your best investment. |
| Skipping the cold water soak | Surface starch is the enemy of crispiness. Fifteen minutes in cold water removes it. This step is not optional, it’s essential. |
| Not drying properly after soaking | You did the soak. You removed the starch. Then you put wet chips in the air fryer and undid all of it. Dry them completely. Every time. |
| Crowding the basket | Stacked chips steam each other and turn soft. One layer, space around each chip, multiple batches. Non-negotiable. |
| Adding salt before cooking | Salt draws moisture out mid-cook and fights against the crisping process. Add dry spices before, salt after. This order matters. |
| Not watching the last few minutes | Thin potato chips have very little margin between golden and burnt. Stay nearby, check frequently, pull them at golden brown. |
| Cooling them on a plate | Plates trap steam underneath and soften the bottom of your chips. Always cool on a wire rack so air gets everywhere. |
Alternatives & Substitutions
Potato varieties: Maris Piper and russet potatoes are the top picks for chips because their high starch content produces the crispiest results. King Edward potatoes also work beautifully. Waxy potatoes like Charlotte or new potatoes have higher moisture content and are harder to get truly crispy—technically possible, but you’re making things harder for yourself than necessary.
Oil options: Sunflower oil has a neutral flavor and handles heat well—a solid everyday choice. Avocado oil works brilliantly at high heat with a clean taste that lets seasonings shine. FYI, a refillable oil mister gives you more control over how much oil you’re using and ensures an even coating without over-oiling.
Flavor variations worth trying: Salt and vinegar is a classic for a reason—lightly spray with malt vinegar or cider vinegar after cooking for that sharp, tangy hit. For cheese and onion vibes, try nutritional yeast plus extra onion powder. Sour cream and chive works brilliantly with dried chive and a tiny hit of citric acid. Spicy chilli and lime adds serious personality with chilli powder and fresh lime zest after cooking. Each variation takes about thirty seconds of extra effort and produces wildly different results.
Sweet potato chips: Swap regular potatoes for sweet potatoes and follow the same method. They brown faster due to their natural sugars, so drop the temperature to 330°F and keep a close eye on them. The result is slightly sweet, deeply savory, and goes particularly well with a sprinkle of cinnamon and sea salt if you’re feeling adventurous.
Vinegar tip: For proper salt and vinegar chips, soak the potato slices in cider vinegar instead of plain water for 20 minutes before drying and cooking. It infuses the vinegar flavor directly into the potato rather than just coating the surface. The result is genuinely impressive.
Latest Articles
-

-

How to Make Easy Keto Jalapeño Poppers (Perfect for Beginners)
-

How to Make Creamy Crockpot Elote (Mexican Street Corn) for Easy Family Dinners
-
How to Make Perfect Crispy Sliced Potatoes in the Air Fryer (Beginner Guide)
-
Budget Meals Made Easy: Air Fryer Canned Potatoes Your Family Will Love
FAQ (Frequently Asked Questions)
Q. Why do my homemade air fryer chips keep going soft after cooking?
Ans: Two likely reasons. First, you’re cooling them on a plate, which traps steam underneath and softens the bottom—switch to a wire rack immediately. Second, you might be storing them in an airtight container, which locks in moisture. Store at room temperature in a paper bag or loose bowl and eat them within a few hours. They’re genuinely best eaten fresh, which—let’s be honest—isn’t exactly a hardship.
Q. Do I really have to cook in batches? Can’t I just fit them all in at once?
Ans: You can try fitting them all in at once, and then you’ll end up with soft, steamed potato slices and a valuable life lesson about why single-layer cooking exists. Overlapping chips steam each other instead of crisping. Yes, batches take longer. Yes, it’s worth it. Cook in batches, eat better chips. That’s the deal.
Q. Do I need a mandoline slicer, or can I use a knife?
Ans: A sharp knife absolutely works—it just requires patience, focus, and reasonably good knife skills to get slices thin and consistent enough. A mandoline gets you there in a fraction of the time with zero guesswork. If you make chips regularly—or plan to start—a mandoline is one of the most useful kitchen tools you can own. They’re inexpensive and earn their counter space quickly.
Q. Can I make a big batch and store them for later?
Ans: You can store them for a few hours in a paper bag or open bowl at room temperature and they’ll stay reasonably crispy. For longer storage, let them cool completely and keep in a loosely sealed container—not airtight—at room temperature for up to 24 hours. They won’t be as crispy as fresh, but they’re still very good. To refresh them, pop back in the air fryer at 350°F for 2–3 minutes and they’ll perk right back up.
Q. My chips are browning unevenly — some are golden, some are pale. What’s going wrong?
Ans: Almost certainly a slicing consistency issue. Thinner slices cook faster and brown more, thicker slices lag behind. This is exactly why uniform slicing matters so much with this recipe. A mandoline solves it completely. If you’re cutting by hand, slow down and focus on keeping each slice as close to the same thickness as possible. Also make sure you’re moving the chips around every 5–6 minutes so all sides get equal air fryer attention.
Q. Can I make these without any oil at all?
Ans: Technically yes, but the results are noticeably less good. Oil serves two purposes here: it helps the chips crisp up golden rather than just drying out, and it acts as the glue that holds your seasonings onto the surface. Completely oil-free chips tend to come out slightly leathery and dull-looking. A tablespoon across a whole batch is genuinely not much—it’s worth including for the significant improvement it makes.
Q. What’s the best dipping sauce to serve with homemade chips?
Ans: Classic ketchup and mayonnaise are always right. Garlic aioli takes things up a notch with minimal effort. Sour cream and chive dip, malt vinegar for traditional salt and vinegar vibes, sriracha mayo for heat lovers, or a simple burger sauce if you want to feel like you’re at a proper diner. The chips are the star, but a good dip is an excellent supporting act.
Final Thoughts
And just like that, the sad rattling bag of broken crisps in your cupboard is officially a thing of the past. Homemade air fryer chips are crunchier, more flavorful, endlessly customizable, and made with ingredients you can actually name. Once you nail the technique—thin slices, proper drying, single layer, watch the last few minutes—you’ll make these on repeat without even thinking about it.
Start with the classic salt and smoked paprika version to get your confidence up, then go wild with flavors. Salt and vinegar. Cheese and onion. Spicy chilli lime. Sweet potato with cinnamon. Each one is a genuinely fun experiment that costs almost nothing and produces something you’ll be genuinely proud of.
Now go impress someone—or honestly, just yourself on a Friday evening with a bowl of incredible homemade chips—with your new air fryer expertise. You’ve absolutely earned that crunch.